Help
A Simple Messaging Scenario
Help menu
- Help content
- AS2
- Examples and Tutorials
- IO Queues and Forms
- Maps
- Schemas
- Send and Receive Ports
- Send and Receive Ports / Transports
- Servers
- Static Configuration
- Tracking
- Workflows
- Workflows / Workflow Activities
- Call Web Service Direct Activity
- Compensatable Sequence Activity
- Compensatable Transaction Scope Activity
- Compensate Activity
- Conditioned Activity Group
- Database Activity
- Delay Activity
- Event Handling Scope Activity
- Event Driven Activity
- Expression Activity
- Fault Handler Activity
- If Else Activity
- Increment Activity
- Invoke Web Service Activity
- Invoke Blue Integrator Workflow Activity
- Invoke Workflow Activity
- Listen Activity
- Map Activity
- Parallel Activity
- Policy Activity
- Send Receive Port Response Activity
- Replicator Activity
- Send Receive Port Response Activity
- Send Port Message Activity
- Sequence Activity
- Suspend Activity
- Synchronization Scope Activity
- Transaction Scope Activity
- While Activity
A simple Messaging Scenario helps explain the flow of messages. In this simple scenario a message is received on one Port, and sent straight to another port. For this example we will pick up files from C:\FilesIn, and copy them to C:\FilesOut. Before we start, please create these Folders. If you wish, you can see the process in practice by following these steps:
- 1. Create a Receive Port named FilesIn. To do this, right click on the Receive Ports node in the Blue Integrator Explorer tree, and select New Receive Port. The following form will appear:
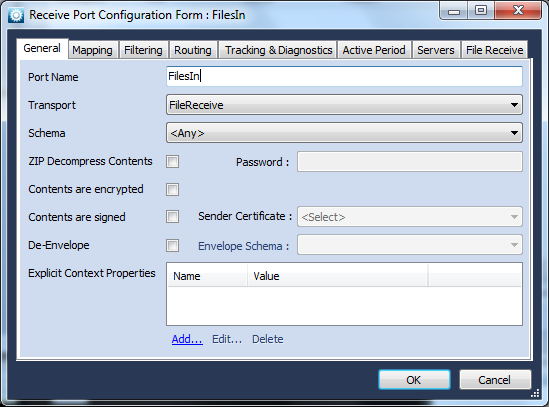
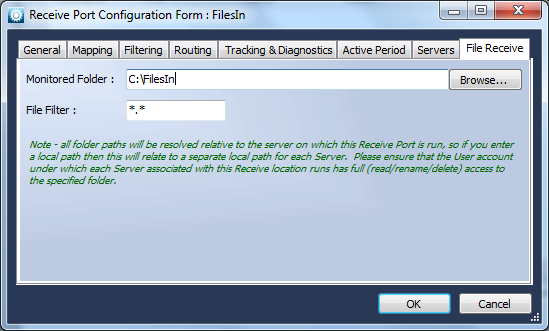
On the General tab, enter the port name as FilesIn. Select the Transport as FileReceive. This will then take you to a new page where you enter details about the File transport. We just need to enter the Monitored Folder C:\FilesIn.
We must specify at least one Server for this Port to run on. Click the Servers tab, and check the Server you created on first configuring Blue Integrator. Please ensure that the account under which this server runs has access to pick up and delete files from C:\FilesIn.
We’ve created a Port that will pick files up from C:\FilesIn, and has an associated Server. As you can see there are many more port processing options you can set but for the moment this satisfies our requirement.
- 2. Create a Send Port called FilesOut. To do this, right click on the Send Ports node in the Blue Integrator Explorer tree, and select New Send Port. The following form appears:
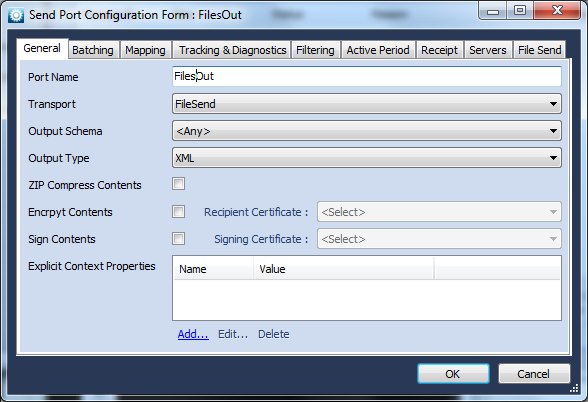
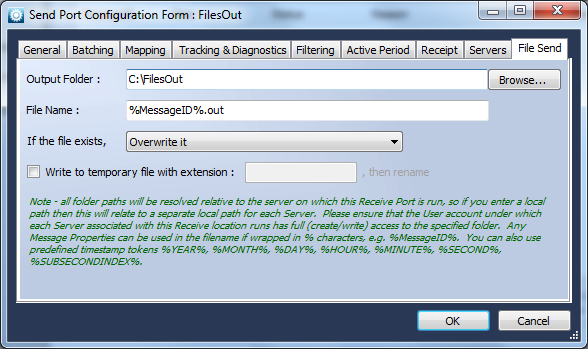
On the General tab, enter the port name as FilesOut. Select the Transport as FileSend. This will then take you to a new page where you enter details about the File transport. We just need to enter the Monitored Folder C:\FilesOut.
We must specify at least one Server for this Port to run on. Click the Servers tab, and check the Server you created on first configuring Blue Integrator. Ensure that the account under which this server runs has access to write files at C:\FilesOut.
We’ve created a Port that will send files to C:\FilesOut, and has an associated Server
- 3. Add a routing entry from FilesIn to FilesOut. Right click on the FilesIn port under the Receive Ports node in the Blue Integrator Explorer tree, and select Properties. Click on the Routing tab, and click Add Port. Select Port FilesOut, and click OK.
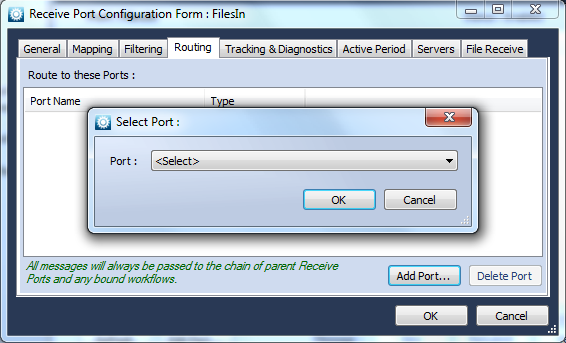
Close the Properties form.
- 4. Enable the Ports. Select both FilesIn and FilesOut in turn in the Blue Integrator Explorer tree, and click on the Enable link in the right hand pane (or use the right click menu).
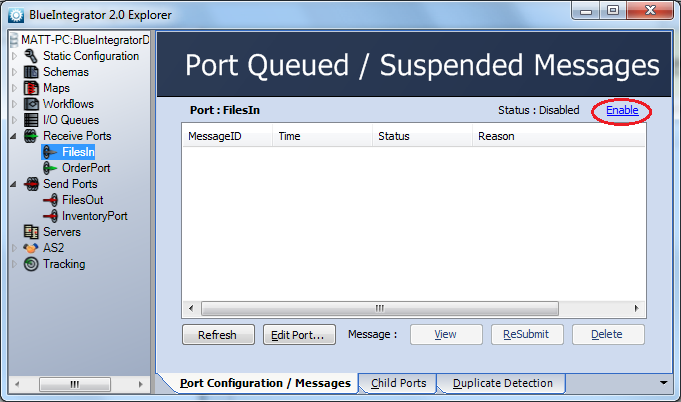
Also ensure that the Server assigned to the ports is started.
- 5. Drop a file into C:\FilesIn This can be any file, as we didn’t specify a schema for either of the Ports. It should disappear within a couple of seconds, and a copy (named as a GUID – the unique Message ID) should appear in C:\FilesOut. If the file doesn’t disappear, double check that the Receive Port is enabled and the Server is running. If it disappears but doesn’t reappear, double check that the Send Port is enabled and the Server is running, and also check the Tracking log for errors. You can access the Tracking log by selecting the Tracking node in the Blue Integrator Explorer tree.
