HL7

Manage HL7


Blue Integrator – manage HL7

There are many different variants of database management solutions with Blue Integrator. Below we show a possible alternative.

Create (Import) a Receive Schema.

  • Create (import) a Send schedule.
  • Create and configure the Receive port.
  • Create and configure Send Port.
  • Mapping.

Test how Blue Integrator converts and transforms HL7_msg → Database.

Before using Blue Integrator, a database must be created. This database will act as a destination for our data. In this example, we will create a separate database that can keep the information with the following three tables: InsuranceIN2, IO_Message and Patient.

HL7 database Insurance
HL7 database IO message

Create a Receive Scheme

The first thing that has to be done in the process of managing a database with Blue Integrator is to create a Receive scheme. You can easily do this by clicking on “Import HL7 Schema”. You now get a box where you can choose between different versions and types of messages (see image below). In this example, version 2.5 and ADT_A01 message are used. Click OK to proceed. Detta gör du enkelt genom att klicka på ”Import HL7-schema”. Du får nu upp en ruta där du kan välja mellan olika versioner och typer av meddelanden (se bilden nedan). I detta exempel används version 2.5 och ADT_A01 meddelande. Klicka på ok för att gå vidare.

The Receive schedule is now imported. This is shown under Schemes → Selected Version.

Create a Send Schedule

For Send Schedule, you can either import the same HL7 schedules as when creating the Receive Schedule or choose another type of schema by right-clicking Schedule in the Explorer and selecting New Schedule. Here you can also import a separate schema. Under the Tools option, you can choose to import an already existing schedule that meets the needs of an outgoing file. Under alternativet Tools kan du välja att importera ett redan existerade schema som möter behoven av en utkommande fil.

HL7 Schema Special Schema

(In our example, we will only need one schedule when we choose to use the same as for Recieve)

Create and configure the Receive port

The next step in the process is to create a Receive port that connects to the Receive schema. The first step in this step is to right-click Recieve Port in the explorer and select New Receive Port.

HL7 recive port

Name the gate, in this case we have chosen to rename it to rec_ADT_A01.  In the next mode, select your new schedule and then choose how to receive the data. In this example, we use “File Receive”.

Now, choose which folder rec_ADT_A01 should listen to. In this example we have chosen to look only for .xml files. Remember to select server under the Server tab.

HL7_rec_port_folder

Even in the Routing menu, a destination port must be added, but this is not possible before a Send port is available.

Create and configure Send Port

Now it’s time to create a Send port so that the information can be submitted to the previously created database. Start by right-clicking Send Port and select New Send Port.

HL7_snd_port

Rename the port to something fitting, in this example it’s called snd_ADT_A01. In the next step, choose a scheme, in this example we will select the same as in rec_ADT_A01. Now select Hierarchical Database.

Begin by connecting to your database under Database Connection.

Now it’s time to create insert querys. First, you create one that can connect PID to your table: Patient. Click PID in the list on the left and type your query: insert into Patient (fk, PatientId, familyname, givenname) values (@fk, @patientid, @familyname, @givenname).

HL7_snd_port_query_PID-1

Parameters will be created automatically. For each parameter you enter into your query, start with a “@”. Now it’s time to connect a value to the parameters, by choosing which Value Type to use. <XPath> means that you can select parameters directly via on each value if you have a schedule linked to your port.

In this step it’s time to handle IN2 in the same way as PID and link it to the table: InsuranceIN2: Insert into InsuranceIN2 (fk, InsuredEmployeeID, InsuredEmployerID, EmployerInformationData) values (@fk, @InsuranceEmployeeID, @InsuredEmployerID, @EmployerInformationData. Do not forget to choose server under Server tab Even on Send Port. Click OK. Now it’s time to make the final step on the Receive port, the routing where you add Send Port.

Mapping

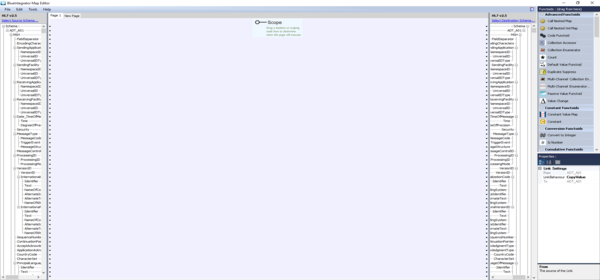
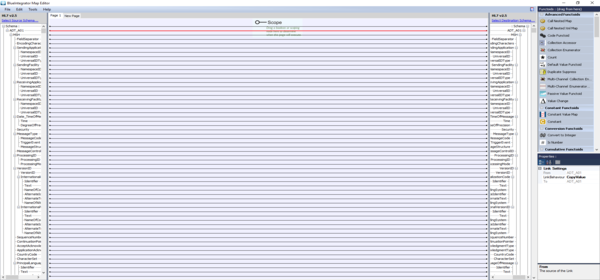
In this example, no mapping is required because we use the same schedule in and out, but below is an example of how easy mapping is.

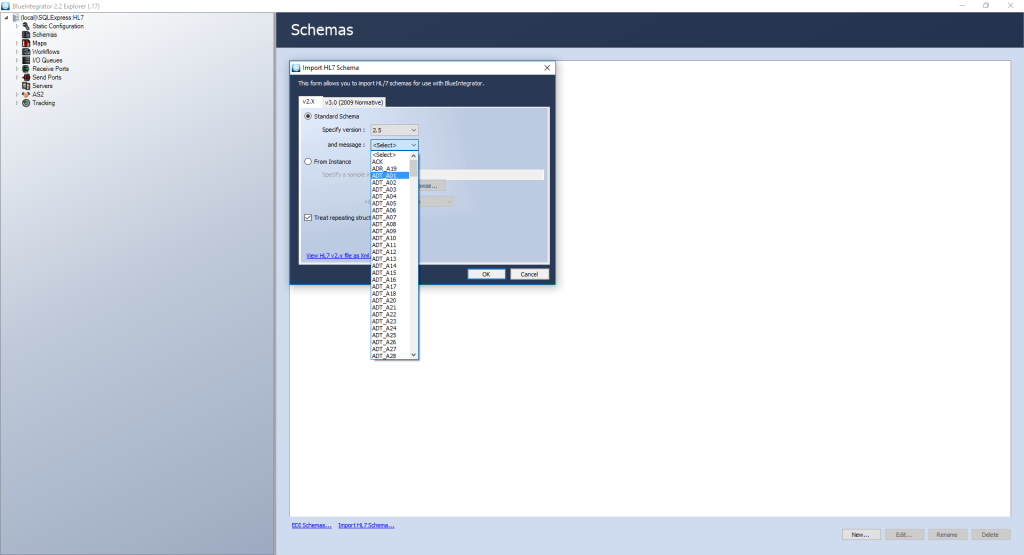
Right-click Maps in the Explorer and select New Map. Now select an in-schedule and an outline that will be done at the top of each page.

Now, just match the respective elements with each other. In this example they are identical, but in the case when they are not, it may look very different.

As mentioned earlier, we do not need mapping in this example, but if needed later, mapping is added under the mapping tab to either receive or send port.

Test how Blue Integrator converts and transforms HL7_msg → Database.

The first thing you need to do is open the patient table. In this example there is a row there because the patient table is already driven once for the test.

Here’s what the InsuranceIN2 table looks like (just like the patient table, this table is empty for the first time).

Now it’s time to enter ADT_A01.xml containing the information you need for the test in the folder that rec_ADT_A01 is listening to.

Look in the database again, if a row has been added, the test is successful!

HL7_test_Patient_2

It is easy to convert and transform information using Blue Integrator. All you have to do is select file type, look and configure ports.

Try for free

Download Blue Integrator Trial

Solutions

Future-proof your business