Help
Creating a Map Example
Help menu
- Help content
- AS2
- Examples and Tutorials
- IO Queues and Forms
- Maps
- Schemas
- Send and Receive Ports
- Send and Receive Ports / Transports
- Servers
- Static Configuration
- Tracking
- Workflows
- Workflows / Workflow Activities
- Call Web Service Direct Activity
- Compensatable Sequence Activity
- Compensatable Transaction Scope Activity
- Compensate Activity
- Conditioned Activity Group
- Database Activity
- Delay Activity
- Event Handling Scope Activity
- Event Driven Activity
- Expression Activity
- Fault Handler Activity
- If Else Activity
- Increment Activity
- Invoke Web Service Activity
- Invoke Blue Integrator Workflow Activity
- Invoke Workflow Activity
- Listen Activity
- Map Activity
- Parallel Activity
- Policy Activity
- Send Receive Port Response Activity
- Replicator Activity
- Send Receive Port Response Activity
- Send Port Message Activity
- Sequence Activity
- Suspend Activity
- Synchronization Scope Activity
- Transaction Scope Activity
- While Activity
This scenario explains how to create a BlueIntegrator Map, and how to use that Map with a Port or Workflow.
- 1. Creating a Map. You create a new Map by right clicking on the Maps node in the BlueIntegrator Explorer, and selecting ‘New Map. This will bring up the Map editor.
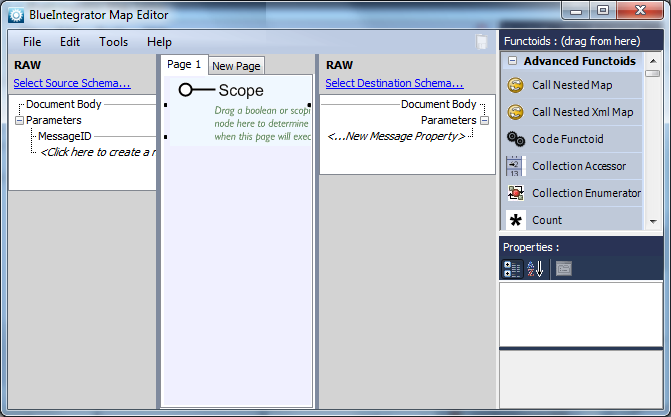
- 2. Specify the Source and Destination Schemas. This done by clicking the Select Source Schema… and Select Destination Schema… links in the headers of the Map editor. The default RAW schema is untyped, and can be used for generic text or binary data. The Document Body of a RAW document can be treated as a string, byte array or stream for the purposes of a functoid input or output. In this way, maps based upon the RAW schema can be used to provide schema-independent preprocessing, for example adding or removing a header block.For our example, we must first create two Test Schemas. The first is the Person schema, detailed in Step 2 of the ‘Creating a Schema’ scenario. Please create and save this Schema if you haven’t already done this.For the second schema, please create a new schema, and paste the following into the XSD box (that is, the large initially empty control taking up the upper middle of the Schema editor
window).
<?xml version=”1.0″ encoding=”utf-16″?>
<xs:schema xmlns:xs=”http://www.w3.org/2001/XMLSchema”>
<xs:element name=”Employee”>
<xs:complexType>
<xs:sequence>
<xs:element name=”FirstName” type=”xs:string” />
<xs:element name=”Surname” type=”xs:string” />
<xs:element name=”Address1″ type=”xs:string” />
<xs:element name=”Address2″ type=”xs:string” />
<xs:element name=”City” type=”xs:string” />
<xs:element name=”Postcode” type=”xs:string” />
<xs:element name=”DateOfBirth” type=”xs:dateTime” />
</xs:sequence>
<xs:attribute name=”EmployeeId” type=”xs:string” />
</xs:complexType>
</xs:element>
</xs:schema>
Save this schema with name Employee.Assign Employee as the Source Schema, and Person as the Destination Schema. That is, our test map will map from an Employee Message to a Person Message. - 3. Add parameters. You can add input and output parameters to the map by clicking the appropriate ‘Click to create…‘ tree item. Map parameters can be specified explicitly in a Workflow, and will otherwise populate from Message Context Properties. Output properties will be set in the Message Context.This test scenario will not use any parameters.
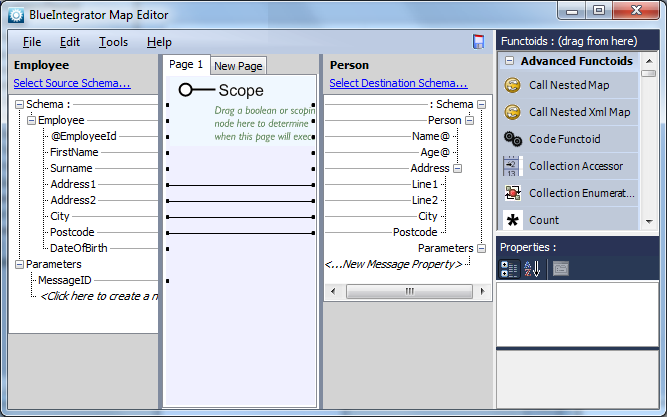
- 4. Add required links. You can drag a link from any node in the source tree to any node in the destination tree. A link says that, when the source node is encountered in the source document, an instance of the linked destination node should be created in the output document. Links can be selected by clicking on them with the mouse, and have a LinkBehavior property that can be set in the Properties pane (in the lower right of the Map editor window) to copy either the name or value of the source element.For our scenario, we’ll create links for the fields which can be copied over without any processing required:
1. Drag a link from Address1 in the source tree, to Line1 in the destination tree.
2. Drag a link from Address2 in the source tree, to Line2 in the destination tree.
3. Drag a link from City in the source tree, to City in the destination tree.
4. Drag a link from Postcode in the source tree, to Postcode in the destination tree.
- 1. Add Functoids. A Functoid is a until of logic that can be dragged onto the Map editor surface (from the functoid palette in the upper right of the Map editor window). Input parameters to the Functoid are dragged and dropped on to the left of it, and the output value can be dragged from the right of the functoid. Functoids can be cascaded, that is the output of one Functoid can be the input of another. BlueIntegrator comes with over 100 predefined Functoids, for purposes as diverse as adding numbers, querying databases, iterating sets and executing Visual Studio for Application code. Consult the application help file for further information.We need to form a name field from separate FirstName and Surname components. To do this we’ll use a String Concatenate Functoid. Drag a String Concatenate Functoid from the String Functoids section of the Functoid palette onto the Map surface.
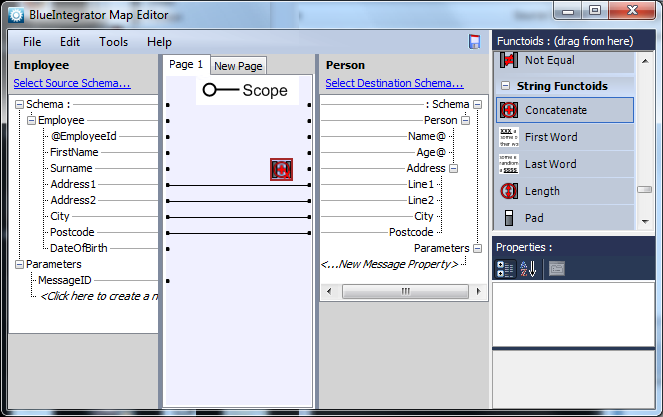
This Functoid will take three inputs, the first name, a space, and the surname. We’ll use a Constant Functoid to form the space (although this value could be bound directly on the Functoid Properties Page). So drag a Constant Functoid from the Constant Functoids section of the Functoid palette to a position just to the left of the String Concatenate Fun-ctoid.
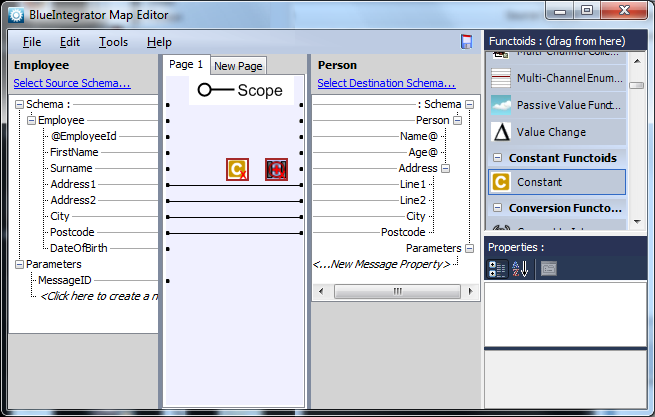
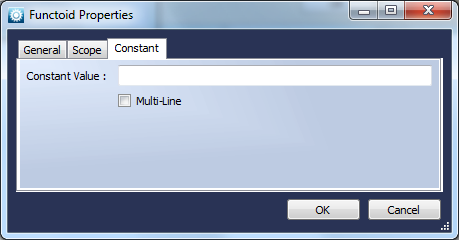
Double-click the Contant Functoid, and enter a space as the Constant value.
Drag a link from FirstName in the source tree to the left of the String Concatenate Functoid (to specify an input value). Then drag from the right hand side of the Contant Functoid (to get the output value) to the left of the String Concatenate Functoid (to specify an input value). Then drag a link from SurName in the source tree to the left of the String Concatenate Functoid (to specify an input value). You may need to reposition the Contact Functoid slightly to be able to do this easily.
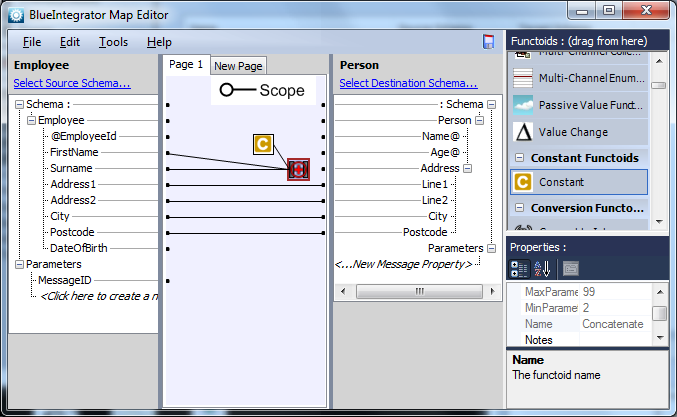
Double click on the String Concatenate Functoid, and check the parameter values for the first three parameters are as expected.

Finally drag from the right hand side of the String Concatenate Functoid to the Name node of the destination tree.
This leaves us with one field to map – the date of birth from the Employee record onto the Age field of the Personrecord. We could use a Date Difference Functoid to do this, but instead we will use a Code Functoid to write custom code to do the job. To do this, first drag a Code Functoid from the Advanced Functoid section onto the Map surface.

Double click on the Code Functoid.

Type ConvertDOBToAge as the Functoid name and click Edit in VSTA…
You may be asked to select a default VSTA language (this example uses C#), and if this is the first time you have launched Visual Studio for Applications it could take up to a minute to generate the templates.
You will see that Visual Studio for Applications is launched, and a function has been generated for you to populate. Replace the implementation with that shown in the following screenshot (or Visual Basic equivalent).

Now return to the Map editor. All we have to do is drag a link from the DateOfBirth node of the source tree to the left (input) of the Code Functoid, and from the right side (output) of the Code Functoid to the Age node of the destination tree, and we’re done!

- 2. Map Pages and Scope. You’ll see that the Map surface contains a page control, that allows you to group links and Functoids onto separate pages, primarily to keep related functionality together and make it easier to manage. A page can also be a logical grouping of scope. A link can be dragged to the Page Scope link at the top of a page, and in this case all links and Functoids on the page will only execute if the value linked to the Page Scope is either boolean true (i.e. the output of a conditional Functoid that has evaluated to true), or an area of the source document that is currently being processed. The source document is processed recursively from start to finish during execution of the Map. For more information please consult the application help file.
- 3. Testing and Debugging. To test the Map, use the menu options in the Tools / Test Map menu group to test the map either with a generated Employee instance or a specific file instance. The map will then be executed, and any execution errors will be reported along with the input and output data (and any flat-file mappings).

To debug the map code, you can use the Debug / Start menu item in Visual Studio for Applications.
- 4. Using the Map. A list of Maps can be specified on Ports (on the Mapping tab), and these can be configured to execute sequentially (i.e. always and in order) or as required (i.e. if a Message arrives at a Port in an unexpected format, BlueIntegrator will use the list of maps provided to try and convert the message into the type expected). Maps can also be invoked explicitly using the Workflow MapActivity.
