Help
Receive Port Configuration Form
Help menu
- Help content
- AS2
- Examples and Tutorials
- IO Queues and Forms
- Maps
- Schemas
- Send and Receive Ports
- Send and Receive Ports / Transports
- Servers
- Static Configuration
- Tracking
- Workflows
- Workflows / Workflow Activities
- Call Web Service Direct Activity
- Compensatable Sequence Activity
- Compensatable Transaction Scope Activity
- Compensate Activity
- Conditioned Activity Group
- Database Activity
- Delay Activity
- Event Handling Scope Activity
- Event Driven Activity
- Expression Activity
- Fault Handler Activity
- If Else Activity
- Increment Activity
- Invoke Web Service Activity
- Invoke Blue Integrator Workflow Activity
- Invoke Workflow Activity
- Listen Activity
- Map Activity
- Parallel Activity
- Policy Activity
- Send Receive Port Response Activity
- Replicator Activity
- Send Receive Port Response Activity
- Send Port Message Activity
- Sequence Activity
- Suspend Activity
- Synchronization Scope Activity
- Transaction Scope Activity
- While Activity
The Receive Port Configuration Form is used to configure Receive Ports. The Receive Port Configuration Form has several tabs across the top of the form:
The tabs and the fields on those tabs are discussed in the sections below. After completing the configuration of a Receive Port through the Receive Port Configuration Form, click the OK button to save the Receive Port information.
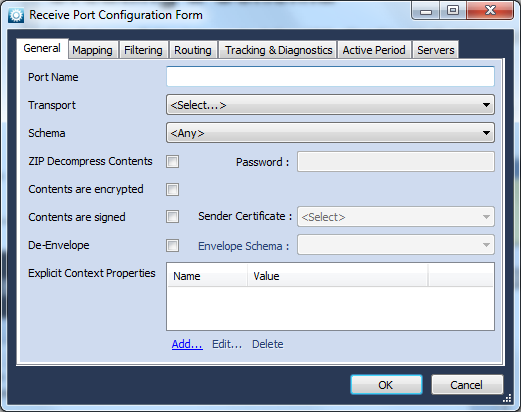
General tab
| Port Name: | The name of the port being created (this should be descriptive to enable you to identify the port from the list of ports) | ||
| Transport: | The transport used for this port (this is a drop-down list) | ||
| Output Schema: | The schema to be used for this port | ||
| Output Type: | The type of output to be sent through this Receive Port | ||
| Zip Compress Contents: | If checked, messages through this Receive Port are compressed with the ZIP algorithm | ||
| Encrypt Contents: | If checked, messages received at this Receive Port are encrypted and should be decrypted. The decryption certificate needs to be specified.
| ||
| Sign Contents: | If checked, messages sent through this Receive Port are signed. The sender’s certificate (public key) must be specified for this option to function. If using web service transport, any selected certificate is used as your identity. | ||
| Explicit Context Properties: | A list of predefined Message Context properties, which can be set to constant values or the results of XPath expressions on the Message being received. Use the Add, Edit and Delete links at the bottom of this pane to manage the content. |
Mapping tab
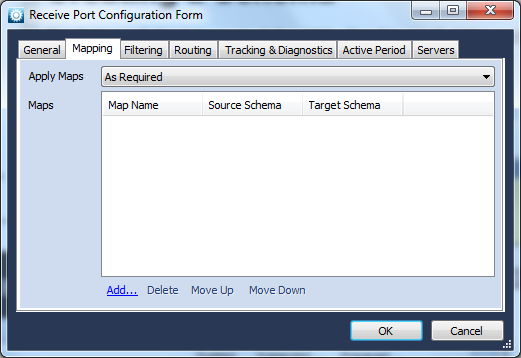
The fields on the Mapping tab are:
| Apply Maps: | Allows you to select whether to apply maps either As Required or In Order |
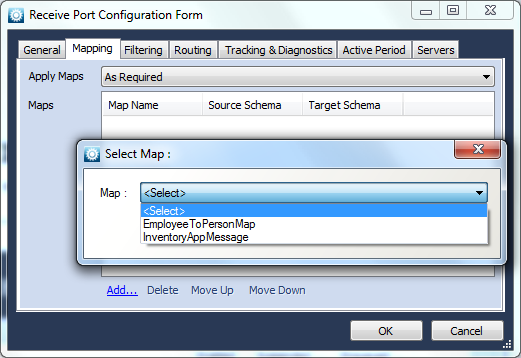
| Maps: | A list of maps that are applied to the messages processed through the Receive Port. Use the Add, Delete, Move Up and Move Down links at the bottom of the pane to create, manage the order of, and remove maps from the list. Selecting the Add link lets you choose the Map to be applied from a drop-down list: |
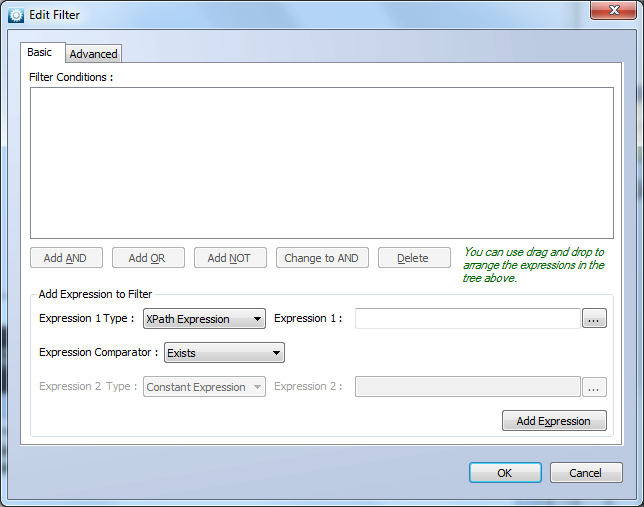
Filtering tab
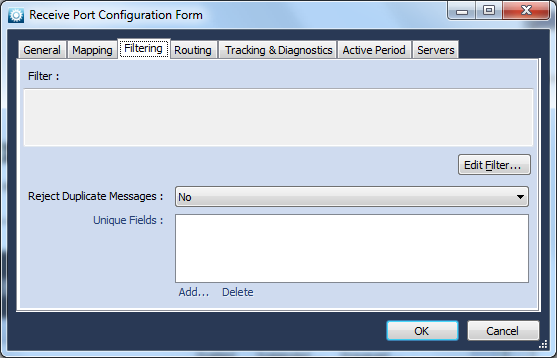
The Filtering tab allows you to set filters applied to messages processed by this Receive Port. To create, modify or delete a filter, click the Edit Filter button and use the Edit Filter dialog to build the filter contents:
The Reject Duplicate Messages option at the bottom of the Filtering tab allows you to configure the Receive Port to reject duplicate messages based on entire message, or parts of a message. You can use the Add and Delete links at the bottom of the pane to configure the unique fields which are assessed for duplicate message entries.
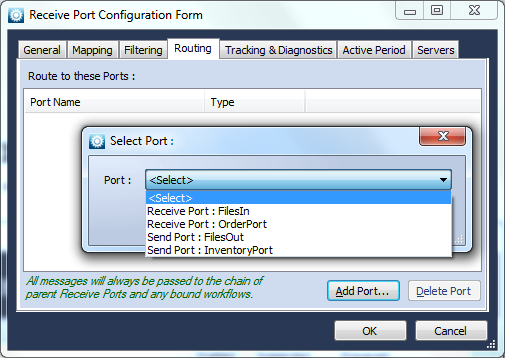
Routing tab
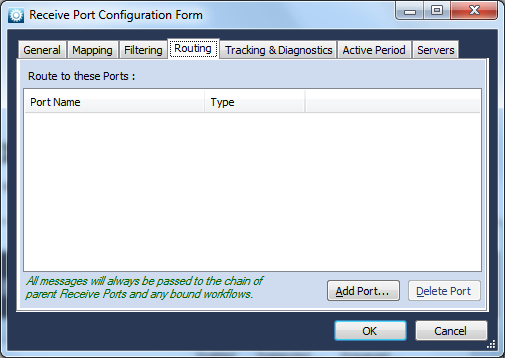
The Routing tab allows you to set a routing entry for the Receive Port. Routing entries allow you to forward Messages received at thjis Port to other Ports, both Send and Receive. To add a Port to the list, click the Add Port button:
Tracking & Diagnostics tab
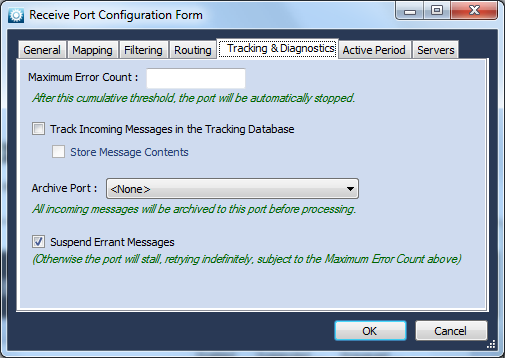
The fields on the Tracking & Diagnostics tab are:
| Maximum Error Count: | Sets the threshold of number of attempts to Receive a message through this Receive Port |
| Track Outgoing Messages in the Tracking Database: | If checked, information about the messages sent through this Receive Port are recorded. When checked, the Store Message Contents option can be selected also, which stores the actual content of the message instead of just general information. |
| Suspend Errant Messages: | If checked, allows a message that is not being sent properly to be suspended. If this option is not checked, a message can choke the Receive Port in an infinite Receive attempt loop, so this option should generally be checked. |
Servers tab
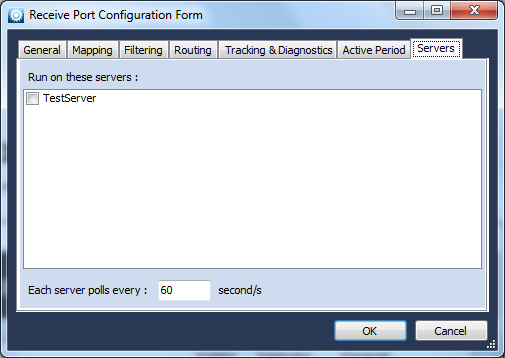
The Servers tab allow you to specify which Servers configured in Blue Integrator will be used for this Receive Port. Checking the name next to the server identifier indicates that server will be used for the Receive Port.
Transport tabs
Depending on the Transport selected, one or more tabs will also be added allowing you to configure the options relevant to that Transport. See the Transports topic for further details.
