Help

Special Schemas

From the Schema Editor click Tools | Special Schemas… as shown below.

The following window appears, presenting a list of schema choices with descriptions.

Jump to:


CSV Files

Selecting this option gives you the window shown below.

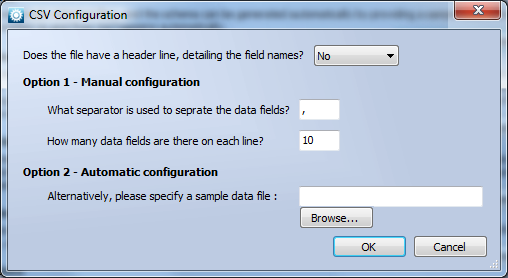
In some CSV files the first row of data denotes the field names, and the actual data starts on the second row. Select Yes if the file you are using or wishing to create is of this variety. The only other information needed is the separator (usually a comma) and the number of fields on each line. These two values can be entered at the relevant prompts, or if you have a sample CSV file these values can be calculated automatically. To use a file click Browse.. and choose the file in the normal way.

NOTE The contents of sample files are only inspected, and not affected in any way.
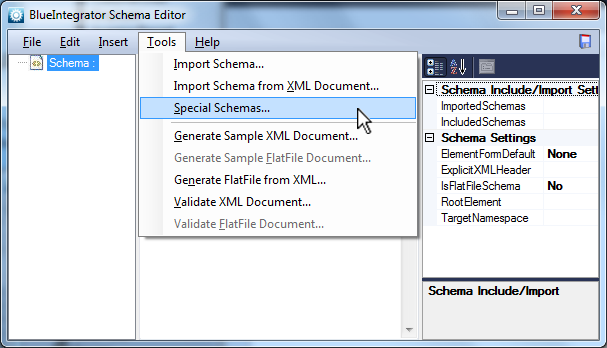


Flat files

Selecting this option will ‘flat file enable’ the current schema. Basically this enables an extra layer of information, required to translate between XML and flat file. Once enabled this information can be entered in the properties section of the elements / attributes / fields. There are various settings and modes, but as a minimum requirement either the Delimiter needs to be defined or the FieldLength of each field specified.


HL/7 Files

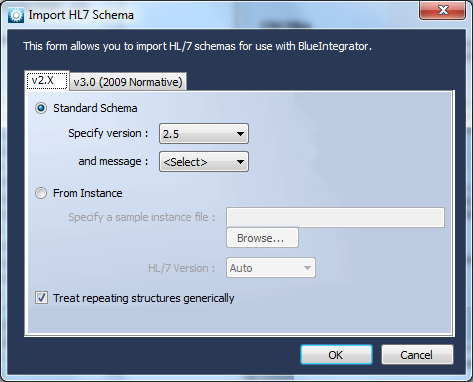
Selecting this option presents a window with two tabs, the first for importing v.2.x HL7 schemas and the second for v3.0 (2009 Normative) schemas.
NOTE This window can be reached directly by clicking the Import HL/7 schema… link in the BlueIntegrator Explorer.


v2.x

A standard schema (currently selected) can be created by specifying the version and message type using the drop-down menus, or the schema can be extracted from a sample instance file by browsing for the file in the normal way and selecting the HL/7 version from the drop-down above. If unsure of the version leave the drop-down choice as Auto.

v3.0

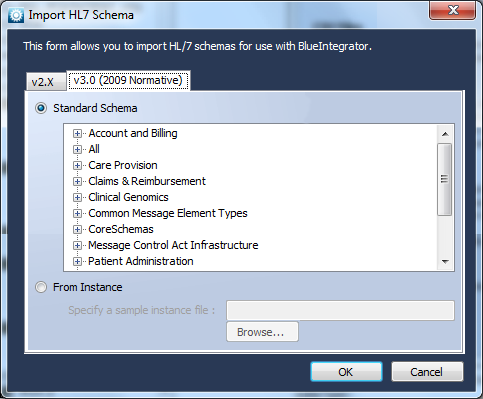
Version 3.0 schemas are created in a similar way to the version 2 schemas (either by choosing a standard or by providing a sample) except that the message types are organized within a tree structure which must be expanded in order to select the required message.

The same process applies when creating a v.3.0 schema from a sample instance: select the radio icon and browse to the file in the normal way.
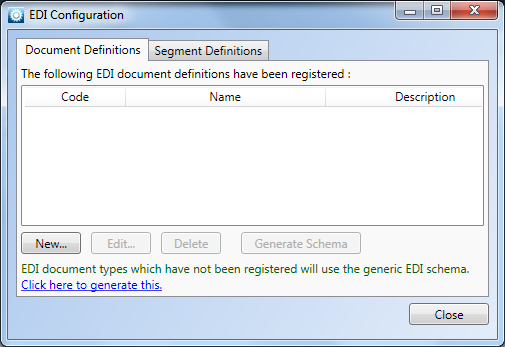

EDI Files

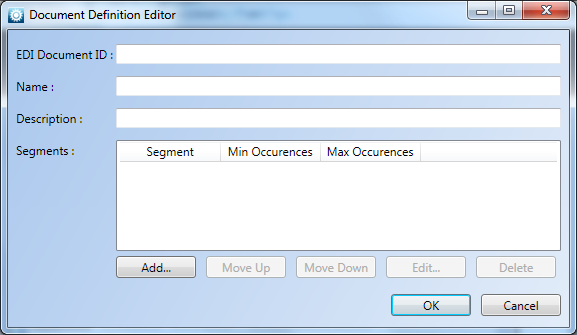
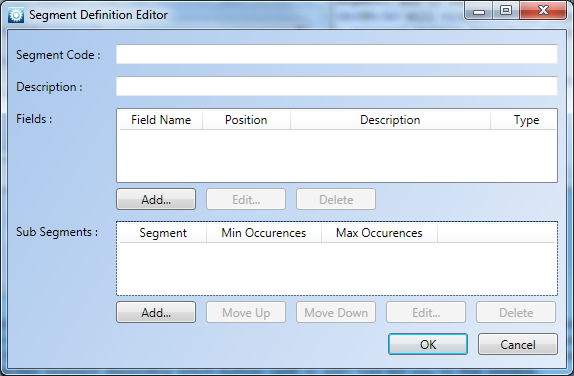
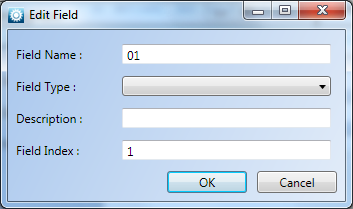
An EDI document definition consists of various segments. Each segment can contain fields of various types and also sub-segments. BlueIntegrator allows libraries to be built up of document definitions and segment definitions as well as allowing generic EDI schemas to be created directly.

If no definitions have been previously created the initial window will appear as below.

NOTE This window can be reached directly by clicking the EDI Schema… link in the BlueIntegrator Explorer.

From this window document definitions and segment definitions can be created, edited or deleted using the buttons provided. Schemas can then be generated from the definitions, or a generic schema can be created by selecting Click here to generate this link.


Creating a document definition

Click New.. to open the Document Definition Editor shown below.

The EDI Document ID textbox requires an integer, the next textbox a name (recommended), and the last (optionally) a description of the users choosing. Below the textboxes will be a list of segments and beneath that buttons for organizing them. The functions of the buttons are summarized in the list below.

Add..Opens a blank Edit Segment window (shown below) for the creation of a new segment
Move UpMoves the selected segment up in the list
Move DownMoves the selected segment down in the list
Edit…Opens the Edit Segment window for the currently selected segment (shown below)
DeleteDeletes the currently selected segment


Adding / Editing a segment

Selecting Add.. or Edit.. will display the following window:

Figure 1

If Edit.. was selected from the previous window the drop-down menu will be displaying the currently selected segment. Use the drop-down menu to choose a segment (if there are any defined) and if required set the minimum or maximum number of occurrences. Selecting OK will either add the segment to the document definition or edit the previously selected segment, depending on the choice of button (add or edit) prior to this window.

In the drop-down menu there is also a <New Segment Type> option: this allows a new segment to be defined and hence displays the Segment Definition Editor.

Figure 2

As described earlier a segment is defined by a code (or name), can have an optional description and can contain a number of fields and sub-segments. These definitions can be seen in the same order (top to bottom) in the Editor. To define a segment enter an identifying integer in to the top textbox and a description (optional) in the textbox below it. The sub-segment list can be organized using the buttons beneath in exactly the same way as in the Document Definition Editor (see above). The field list can be organized similarly, except that the Add… and Edit… buttons lead to the Edit Field window.

A field can be defined with a name, a field type, a description, and a field index. The field name can be defined as an integer or as a word. If the parent segment’s code has been defined, a new field will be automatically named. However the Field Type: must be chosen from the many EDI field types available, and an optional description may also be given.

All segments defined are remembered and listed so they can be re-used for future document definitions. Segments can also be created and stored from outside a document definition, and can be organized by selecting the Segment Definitions tab in the EDI Configuration window as shown below.

Selecting New.. will bring up a blank Segment Definition Editor (see above). Selecting Edit.. will show the same editor but with the currently selected segment, while Delete will remove the currently selected segment from the list.


SAP IDoc Schema


Currently this choice is unavailable; however it will be incorporated into future releases. Please refer to support@blueintegrator.com for further details.