Help
A Simple Workflow Example
Help menu
- Help content
- AS2
- Examples and Tutorials
- IO Queues and Forms
- Maps
- Schemas
- Send and Receive Ports
- Send and Receive Ports / Transports
- Servers
- Static Configuration
- Tracking
- Workflows
- Workflows / Workflow Activities
- Call Web Service Direct Activity
- Compensatable Sequence Activity
- Compensatable Transaction Scope Activity
- Compensate Activity
- Conditioned Activity Group
- Database Activity
- Delay Activity
- Event Handling Scope Activity
- Event Driven Activity
- Expression Activity
- Fault Handler Activity
- If Else Activity
- Increment Activity
- Invoke Web Service Activity
- Invoke Blue Integrator Workflow Activity
- Invoke Workflow Activity
- Listen Activity
- Map Activity
- Parallel Activity
- Policy Activity
- Send Receive Port Response Activity
- Replicator Activity
- Send Receive Port Response Activity
- Send Port Message Activity
- Sequence Activity
- Suspend Activity
- Synchronization Scope Activity
- Transaction Scope Activity
- While Activity
This scenario replicates the Simple Messaging presented in the Blue Integrator Messages topic, but uses a Workflow to accomplish the same tasks.
- 1. Create the Directories and Ports. To do this, follow the steps outlined for the Simple Messaging Scenario in the Blue Integrator Messages topic.
- 2. Remove the Port Routing entry, if one has been created. Edit Port FilesIn, and go to the Routing tab. Select the routing entry to FilesOut, and click Delete. We will use a simple Workflow to route the Message instead.
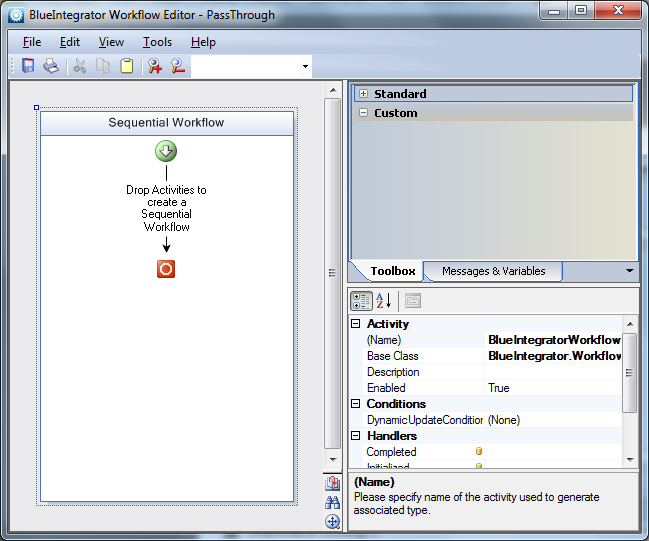
- 3. Create a Workflow. To do this, right click on the Workflows node in the Blue Integrator Explorer tree, and select New Workflow. Enter a name of Passthrough Workflow when prompted. The Workflow editor will appear. Note that this may take up to a minute the first time, as the Visual Studio for Applications templates will be initialized.
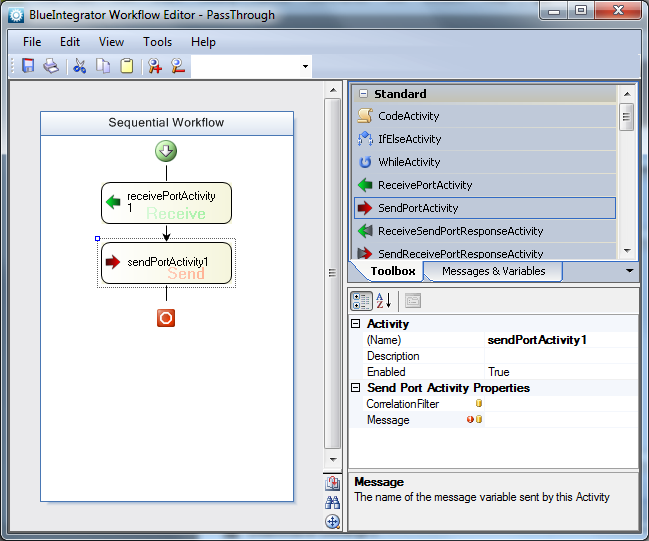
- 4. Create the Activities. For our Workflow we require two activities: a ReceivePortActivity and a SendPortActivity. Drag them, in this order, from the activity palette on the right into the main workflow area on the left. Your Workflow should look like this:
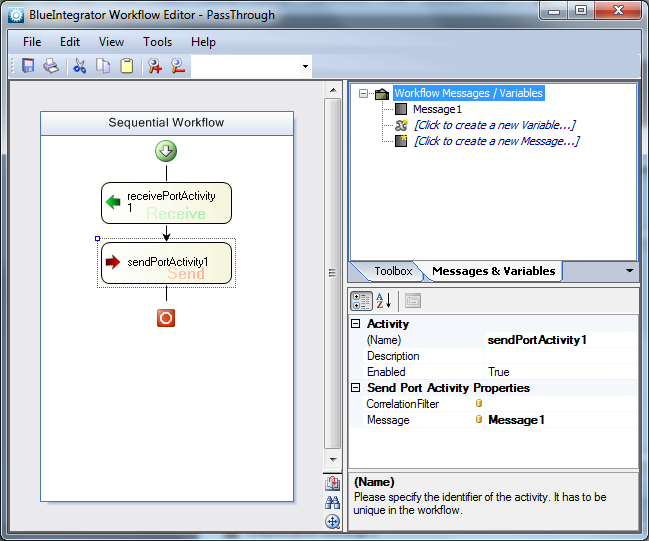
- 5. Define a Message. We require a Message variable to hold the Message being received and sent whilst it is being processed. To create this, click on the Messages and Variables tab of the top-right pane. Then click the item labeled Click to create a new Message…; Enter a Message name of Message1. Having defined a Message or Variable here, it is available for use across the Workflow (and also from VSTA code as a member variable). Note that normally you would associate a schema with the Message, enabling enhanced support for design-time typing of the XML structure in Visual Studio for Applications, but we won’t do this for this example.
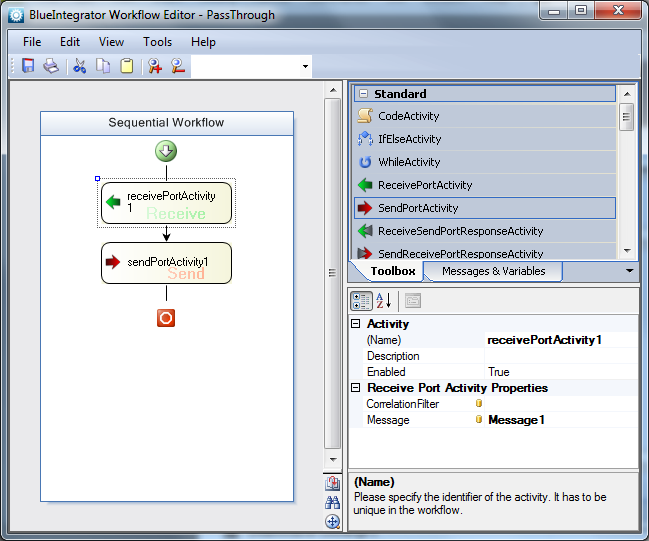
- 6. Assign the Message variable to the ReceivePortActivity. Now we need to tell the ReceivePortActivity to store the message it receives in this variable. To do this, select the ReceivePortActivity, and click in the cell labeled Message in the Properties pane (to the lower right of the window). A drop-down should appear – select Message1 from this drop-down.
- 7. Assign the message variable to the SendPortActivity. We also need to tell the SendPortActivity to pick up the message to be sent from this variable. To do this, select the SendPortActivity, and click in the cell labeled Message in the Properties pane (to the lower right of the window). A drop-down should appear – select Message1 from this drop-down.
- 8. If we wanted to write any more sophisticated logic, we would add, nest and branch extra activities as appropriate. The CodeActivity enables us to execute .Net code in Visual Studfio for Applications. To use this, simply drag it on the Workflow, then double click on the ExecuteCode property in the Properties pane. For the moment we’ll leave our Worflow simply receiving a Message and then re-sending it.
- 9. Save and Close the Workflow editor.
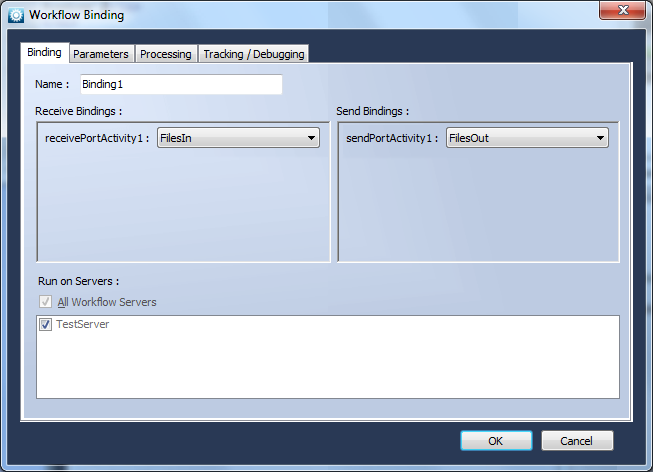
- 10. Now we need to create a Workflow Binding. A Workflow Binding is an association of a Workflow and the ports to be associated with Send and Receive activities along with any parameter variables. A Workflow can be bound many times, against different ports or with different parameter data. To create a Binding, select the Workflow in the Blue Integrator Explorer tree (under the Workflows node), and then select the Bindings tab on the right. Click New Binding…
Give the Binding a name, and select the two ports previously created (FilesIn and FilesOut) respectively as the binding for receivePortActivity1 and sendPortActivity1.
- 11. Ensure the Ports are enabled, and copy a test file into C:\Test1. This can be any file, as we didn’t specify a schema for euither of the Ports. It should disappear within a couple of seconds, and a copy (named as a GUID) should appear in C:\FilesOut. If the file doesn’t disappear, double check that the Receive Port is enabled and the Server is running. If it disappears but doesn’t reappear, double check that the Send Port is enabled and the Server is running, and also check the Tracking log for errors. You can access the Tracking log by selecting the Tracking node in the Blue Integrator Explorer tree.
