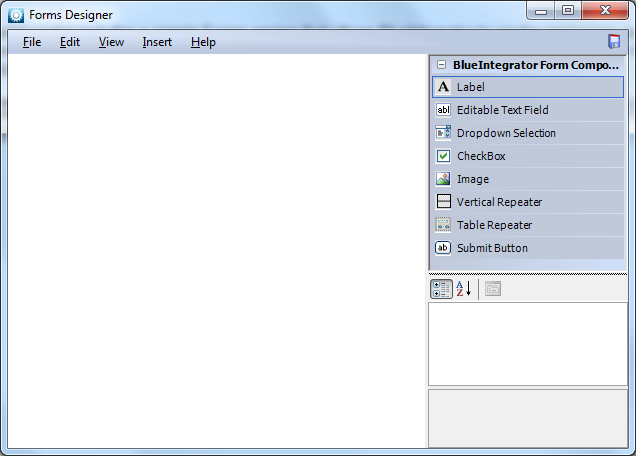
The left pane allows you to see the form as it is created. The right pane shows the controls that are available for the form. There are eight basic types of control available for a form:
Label: A read-only text control (text can be edited by double-clicking). Labels can include token data, entered via the context menu when the label is being edited. Additionally once the format of the tokens has been understood, tokens can be entered directly by advanced users.
- Text Box: A read/write text control.
- Combo Box: Enabling selection from a drop-down list. This control has a DataItems property which specifies the drop-down values, and each drop-down value can have both a display name and a binding value. It also has a DefaultValue property.
- Check Box: Allows a true/false selection. This control has CheckedValue and UnCheckedValue properties, which determine the binding when the control is checked or unchecked respectively. It also has a DefaultValue property.
- Image: Displays an image. The ImageURL property can be browsed, specified as a local path or a URL. (For the image to render in SharePoint however a URL should be used.)
- Vertical Repeater: Contains other controls, which is repeated vertically for every data binding. Typically this is bound to a repeating XML node.
- Table Repeater: Contains columns of other controls, and which is repeated vertically for every data binding. Typically this is bound to a repeating XML node. The number of columns is controlled by the NumColumns property. Other size settings can be configured by properties or by dragging.
- Submit Button: Submits the form.
Controls are positioned on the Forms Editor left pane, and their properties are edited using the Properties sheet in the lower right. All controls have standard font and color properties.
Data is bound to controls by setting the Binding property to an XPath expression or Message property. Repeatable controls (Table and Repeater) can be bound to a container (record) node, other controls should be bound to an XML node directly containing data. Every control also has a Filter property, which determines whether the control will be shown. Data binding is relative to the scope of any containing repeater controls.
On initialization of the form, the data bindings are applied from the source message, and the filters are applied. After the form is successfully closed, the associated message is written back to the I/O Queue as an Outgoing message.
![]() NOTE A form is submitted using a Submit Button control. On clicking this button, the control bindings are all reapplied in reverse from the form data. Additionally if a Binding has been selected for the Submit Button, the BindValue property of the button will be bound to it. Finally any ValidationFilter specified on the Submit Button will be executed, and if the filter is not passed the ValidationMessage message will be displayed and the form kept open. Each form can have multiple Submit Button controls if required.
NOTE A form is submitted using a Submit Button control. On clicking this button, the control bindings are all reapplied in reverse from the form data. Additionally if a Binding has been selected for the Submit Button, the BindValue property of the button will be bound to it. Finally any ValidationFilter specified on the Submit Button will be executed, and if the filter is not passed the ValidationMessage message will be displayed and the form kept open. Each form can have multiple Submit Button controls if required.
