Help
Creating a Schema
Help menu
- Help content
- AS2
- Examples and Tutorials
- IO Queues and Forms
- Maps
- Schemas
- Send and Receive Ports
- Send and Receive Ports / Transports
- Servers
- Static Configuration
- Tracking
- Workflows
- Workflows / Workflow Activities
- Call Web Service Direct Activity
- Compensatable Sequence Activity
- Compensatable Transaction Scope Activity
- Compensate Activity
- Conditioned Activity Group
- Database Activity
- Delay Activity
- Event Handling Scope Activity
- Event Driven Activity
- Expression Activity
- Fault Handler Activity
- If Else Activity
- Increment Activity
- Invoke Web Service Activity
- Invoke Blue Integrator Workflow Activity
- Invoke Workflow Activity
- Listen Activity
- Map Activity
- Parallel Activity
- Policy Activity
- Send Receive Port Response Activity
- Replicator Activity
- Send Receive Port Response Activity
- Send Port Message Activity
- Sequence Activity
- Suspend Activity
- Synchronization Scope Activity
- Transaction Scope Activity
- While Activity
The Schema Editor lets you to define XML, Flat-File, HL/7, CSV and EDI schemas. For a step-by-step example of creating a schema, see A Simple Schema Example.
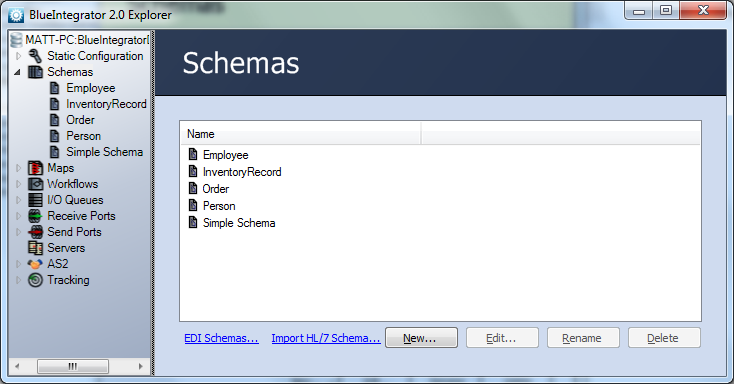
To create a schema, click on Schemas in the BlueIntegrator Explorer window, then click New… at the bottom of the right pane or right click and select New Schema:

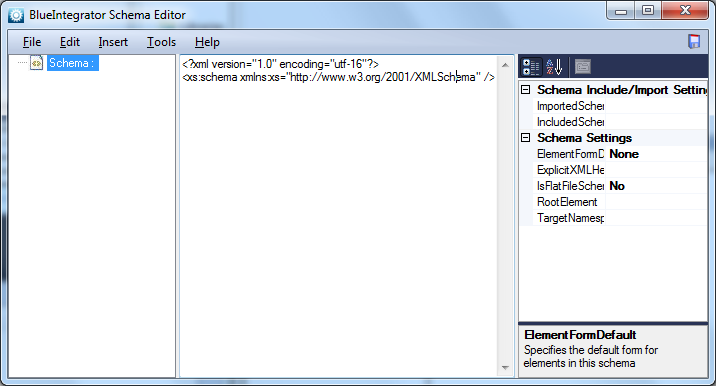
This will display the Schema Editor:

The BlueIntegrator constructs are standard XML forms:
- Attributes are named values
- Elements are XML nodes with
- Groups are stand-alone definitions inside a schema that can be reused by name
Creating a Schema Structure
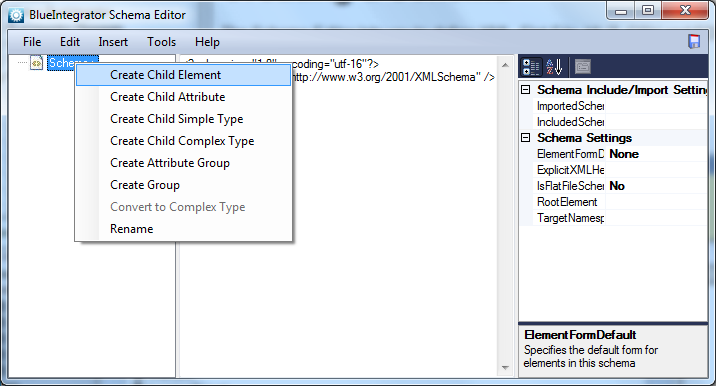
A schema structure is created by right-clicking on the schema node in the tree-view, and selecting one of the options from the pop-up menu:

(Alternatively you can use the application menu items in the Insert menu).
When a node is selected, all the editable properties that apply to that node are shown in the right section Properties form. To edit a property of a node, change the value in the Properties sheet.
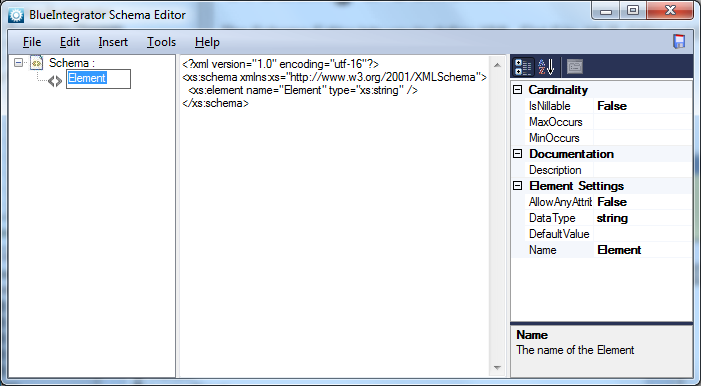
Use the right-mouse button pop-up menu to add to the schema. All items that are created are relative to the selected node. For example, to create a new child element, right-click on the parent node and select Create Child Element from the menu. This will add a new element and populate the center section with the XSD code:

Top-level schema properties are shown on the Properties form after selecting the tree-view root. A good practice is to set a namespace on your schemas, achieved with the TargetNamespace property.
You can then edit the properties of the new child element by highlighting the element and then making changes to the Properties sheet. To add an attribute to the child element, right-click on the new element and select Create Child Attribute. You can then set the attribute property in the Properties sheet. You can rename an element or attribute at any time by right-clicking then selecting Rename from the popup menu.
BlueIntegrator will turn an element into a ComplexType as soon as required (such as when you create an element or attribute inside it). Once defined, ComplexTypes (as well as SimpleTypes) can be reused by selecting the type from the BaseType property in the Properties form. When there is more than one root element or ComplexType, the first such element is taken as the root of the schema. You can explicitly change the root element using the context menu in the tree-view.
Example Simple Schema
A simple schema example is to create customer information which will result in the following XML document:
<Customer CustomerID="1234">
    <FirstName>John</FirstName>
    <Surname>Jackson</Surname>
    <Address>
        <AddressLine1>1000 Pennsylvania Avenue"</AddressLine1>
        <AddressLine2>Washington"</AddressLine2>
        <ZIP>WA11002"</ZIP>
    </Address>
</Customer>
This schema can be created by following these steps :
- Create a new Schema
- Right-click on the root schema -> Create Element
- Name the Element Customer
- Right-click on the Customer -> Create Attribute
- Name the Attribute CustomerID
- Right-click on the Customer -> Create Element
- Name the Element FirstName
- Right-click on the Customer -> Create Element
- Name the Element Surname
- Right-click on the Customer -> Create Element
- Name the Element Address
- Right-click on the Address -> Create Element
- Name the Element AddressLine1
- Right-click on the Address -> Create Element
- Name the Element AddressLine2
- Right-click on the Address -> Create Element
- Name the Element ZIP
Flat Files
- Create a new schema with an element called Root
- Create a second element underneath Root called Line, followed by the elements Date and Quantity under Line
- Navigate to the schema root (in the tree control) and set the property IsFlatFile to Yes
- For the Root element set the delimiter to {System NewLine}
- For the Line element set the delimiter to be a comma
These steps create a simple comma-separated flat file schema with each line containing two comma-separated fields Date and Quantity.
If a schema is a Flat-File, you still define an XML schema capable of holding the data which correlates to the structure of your file. You then associate positional or delimiter data against the different structures in the XML schema. To specify that a schema is Flat File, set the IsFlatFile property on the Properties form. Every item in the tree will now have:
| DelimitMode | The delimiting mode for child fields and records (can be positional, prefix, infix, postfix, or infix with postfix toleration). Positional mode requires that every field has at least the FieldLength property set. All other modes require that the Delimiter property set appropriately. |
| Delimiter | The delimiter for child records (not applicable if DelimitMode is equal to positional) |
| DelimitScope | The scope of the delimiter. If set to UniqueAcrossChildElements, the delimiter will not appear unescaped in any child fields. If set to NotUniqueAcrossChildElements, the delimiter may appear within child fields. Not applicable for positional mode. |
| EscapeString | A character or sequence of characters used to escape instances of delimiter, wrap and other special strings when used in the content of a data field. |
| WrapString | A character or sequence of characters used to wrap a data field in its entirety and effectively escape and exclude from file structure parsing all the characters contained within. Use of the defined wrap character/s is optional. |
| PadCharacter | A character used to pad fixed length fields – only applicable where FieldOffset is set. |
| StripPadCharactersOnLoad | If true, pad characters will be stripped from this field on load. |
| Justification | The field alignment |
| FieldLength | The length of the field, in characters. This can be an integer, the name of a preceding or parent field, or a simple expression involving integers and/or preceding or parent fields (e.g. headerSize*2). This field is optional, except in positional mode where it is compulsory. |
| FieldOffset | The positional location of the field, in characters, relative to the parent record. This can be an integer, the name of a preceding or parent field, or a simple expression involving integers and/or preceding or parent fields (e.g. headerSize+4). This field is optional in positional mode (otherwise fields will be assumed to be sequential), but not relevant to delimited mode. |
| IncludeInFlatFile | If false, this field is not correlated to the flat-file format |
| IgnoreCarriageReturns | If true, inconsistent carriage return / line feeds will be automatically handled by the parser (this property is only available at the Schema level) |

